GDS Projector Instructions #
Turning on the projector #
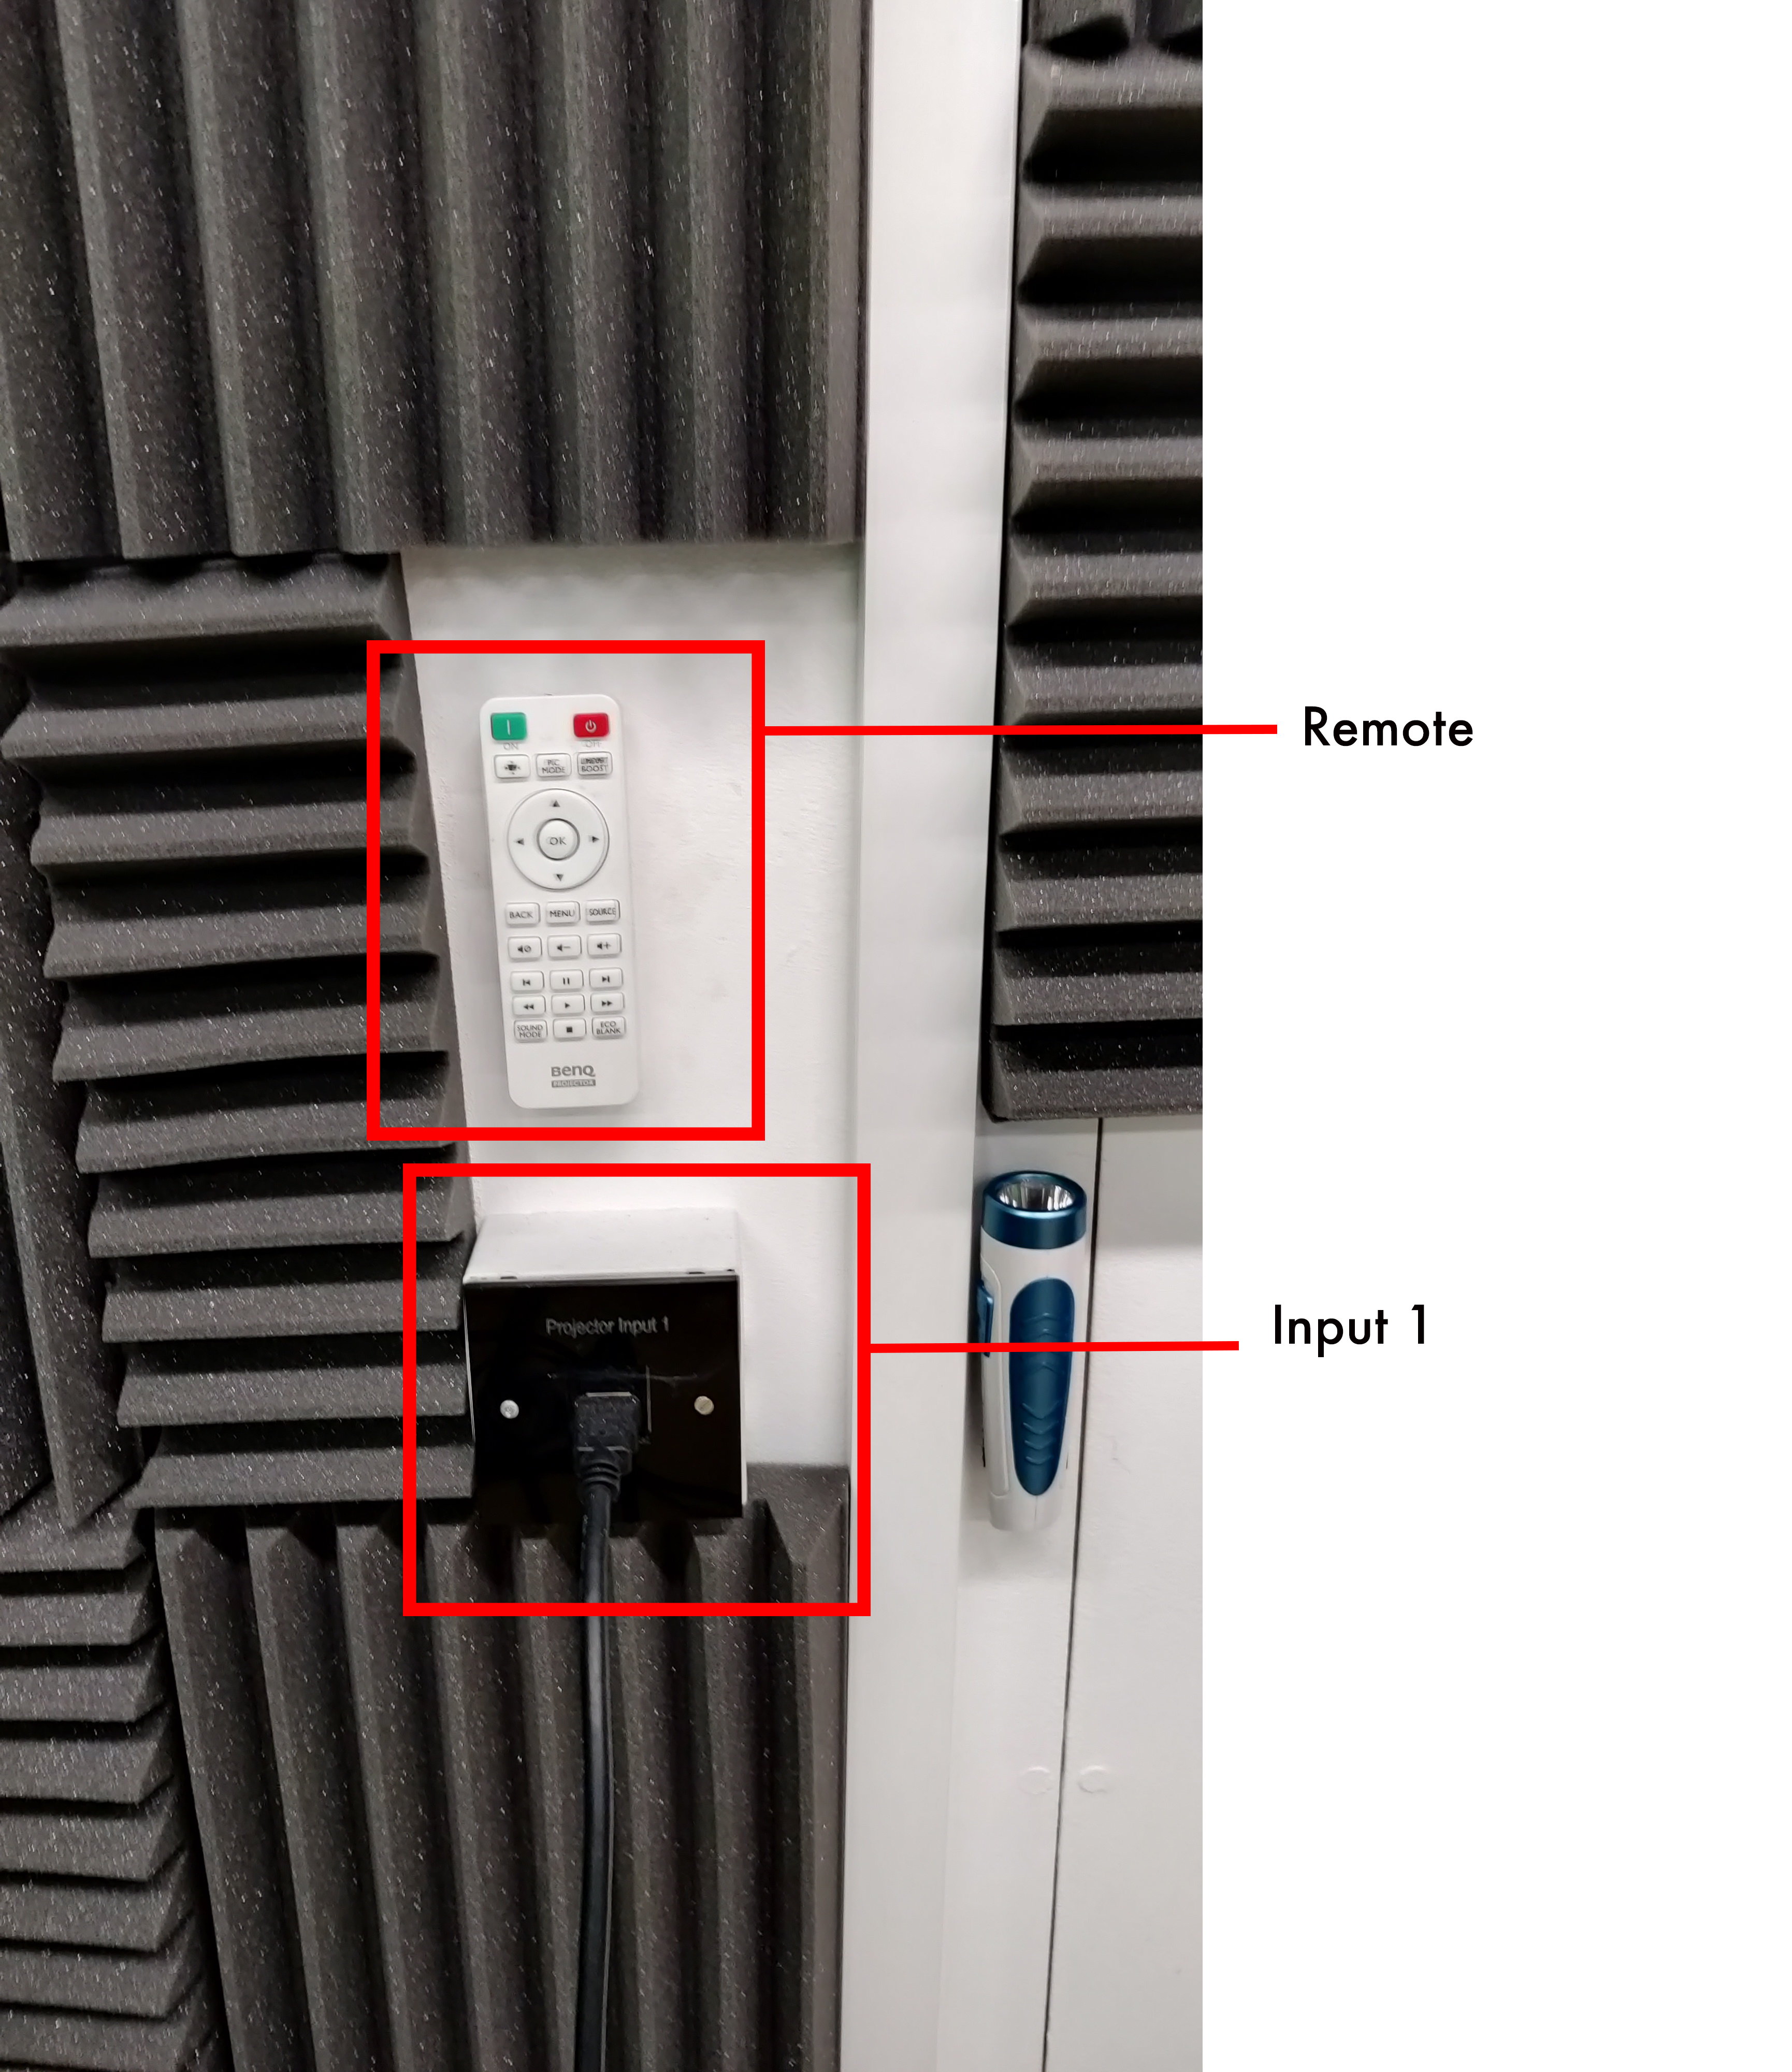
Use the green ‘on’ button on the remote to turn on the projector. The projector should automatically detect the source. If it does not detect the source, use the SOURCE button on the remote to manually select the source. Use HDMI 1 to use the options from the video switcher.
Selecting an input #
To make changing the projector input easy in this room, we use a switcher. To switch between the different inputs, all you need to do is turn on the projector and hit the button that corresponds to the input you want.
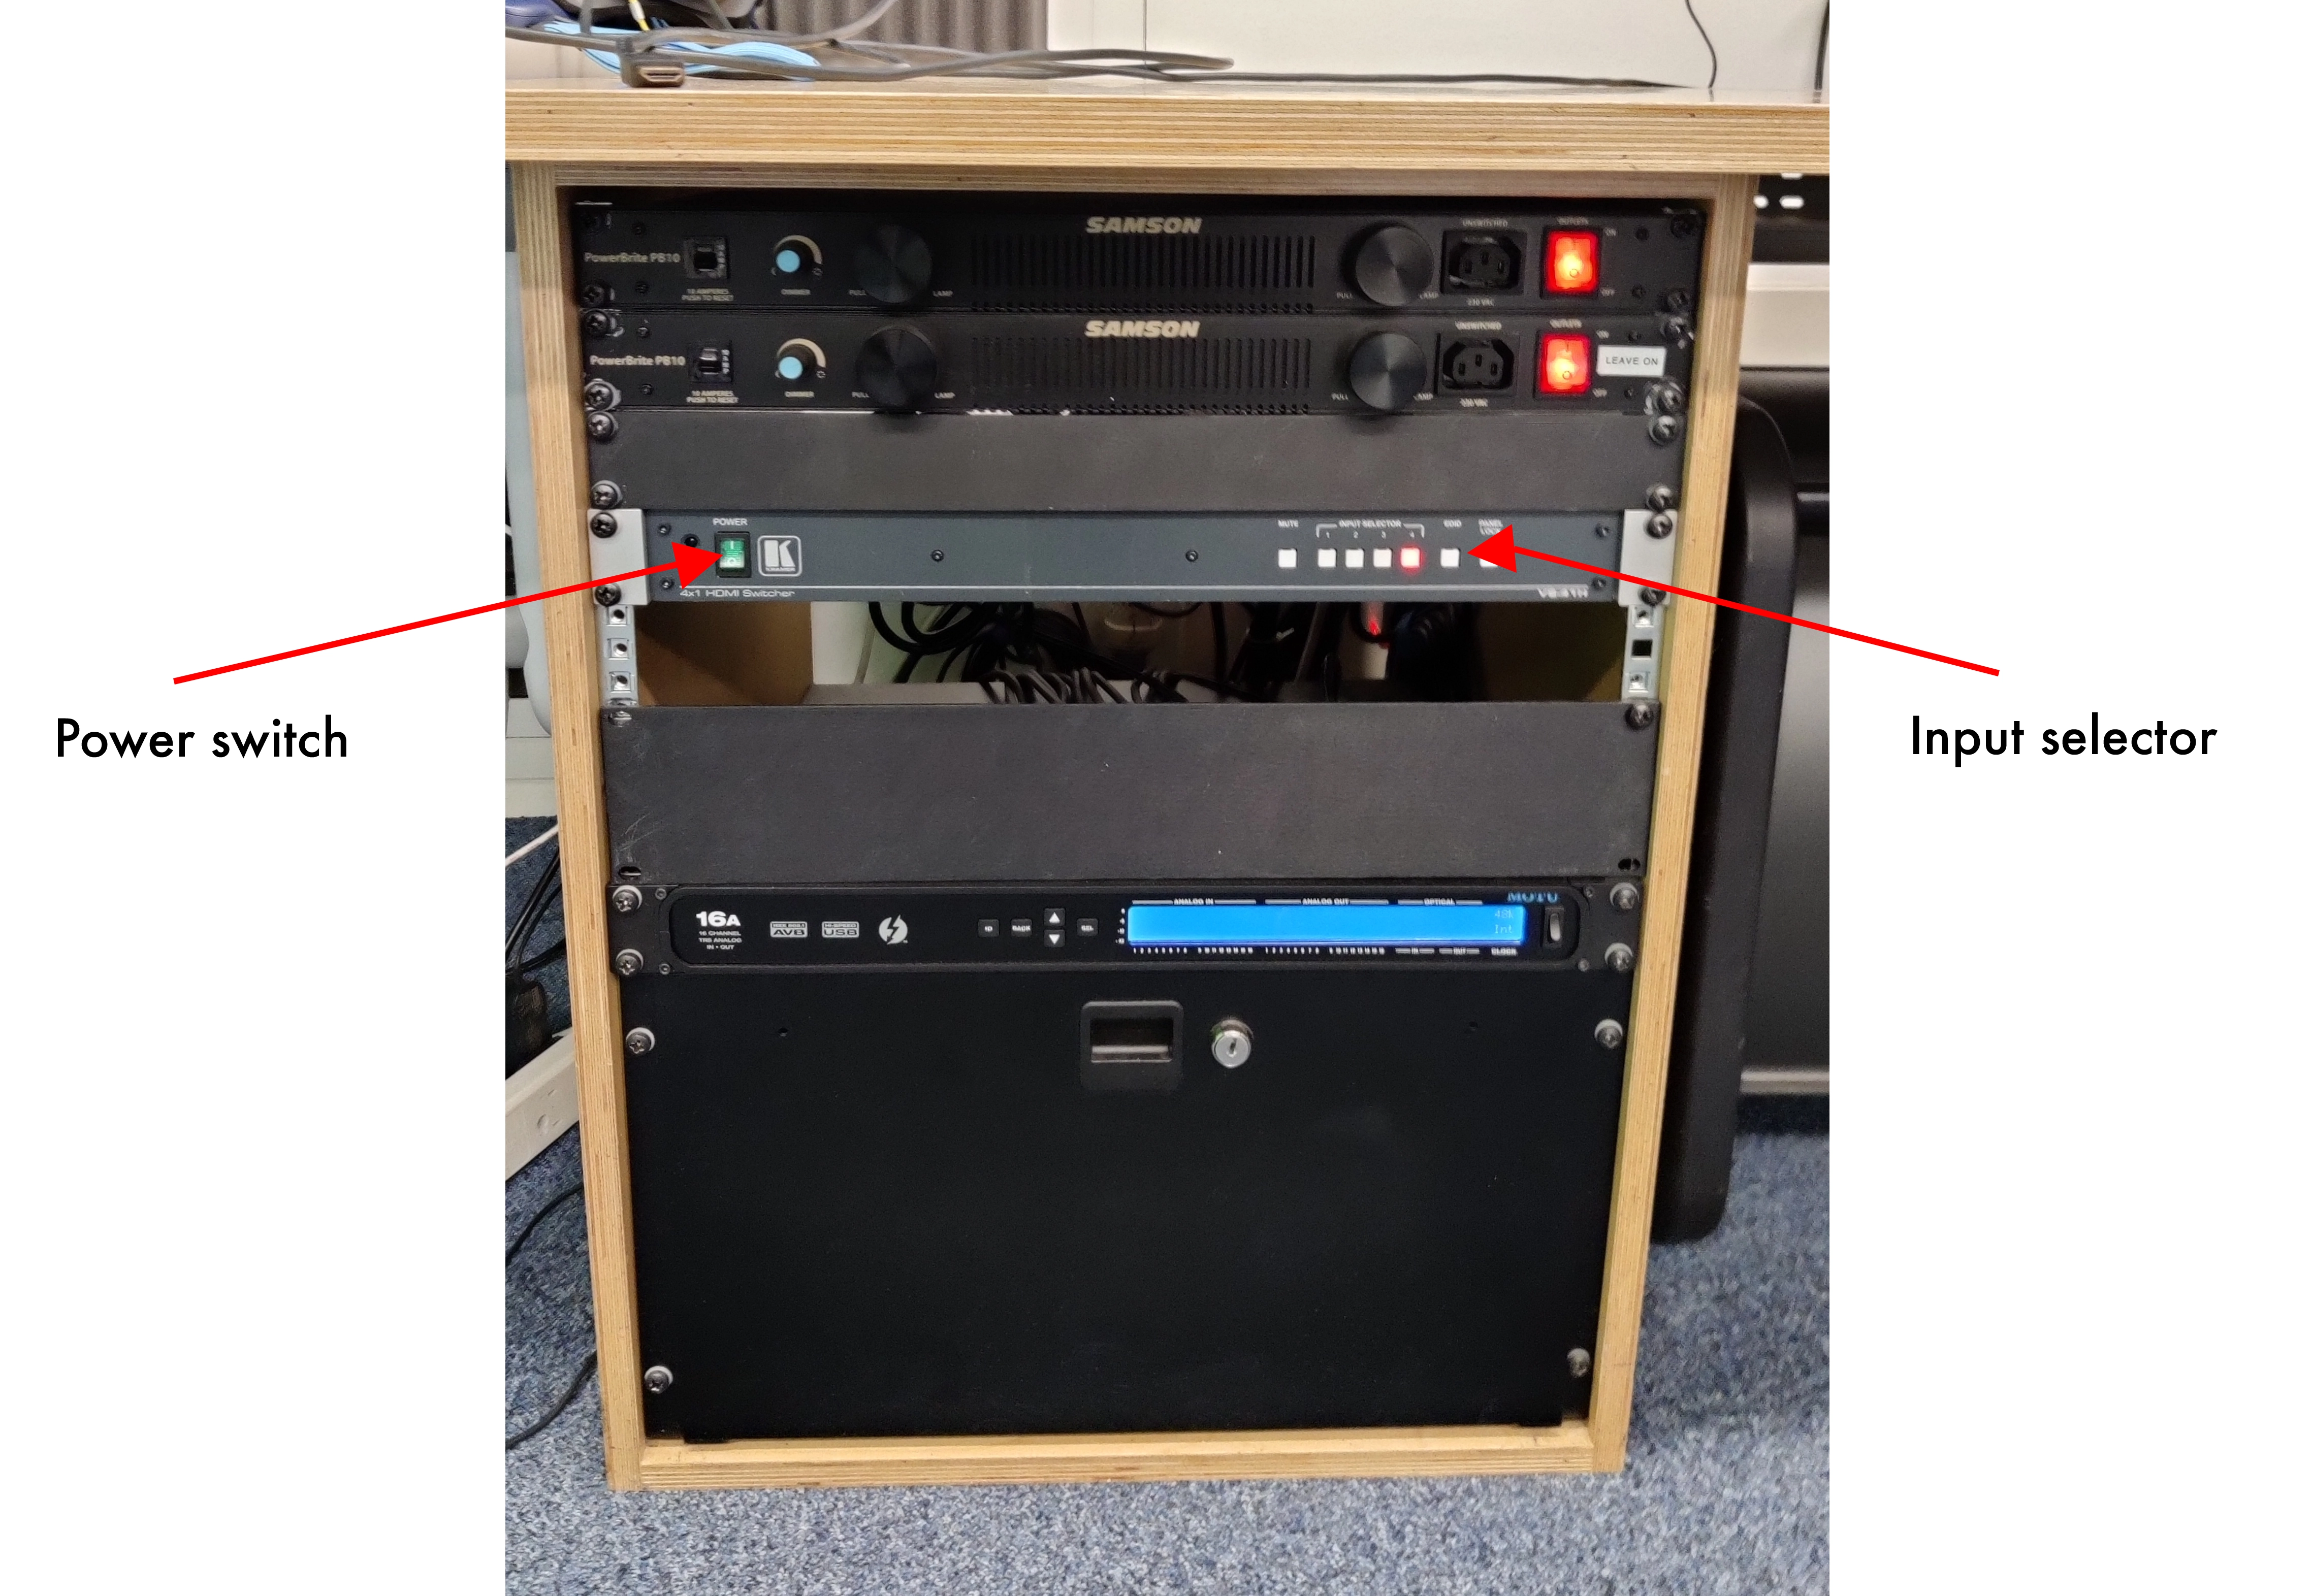
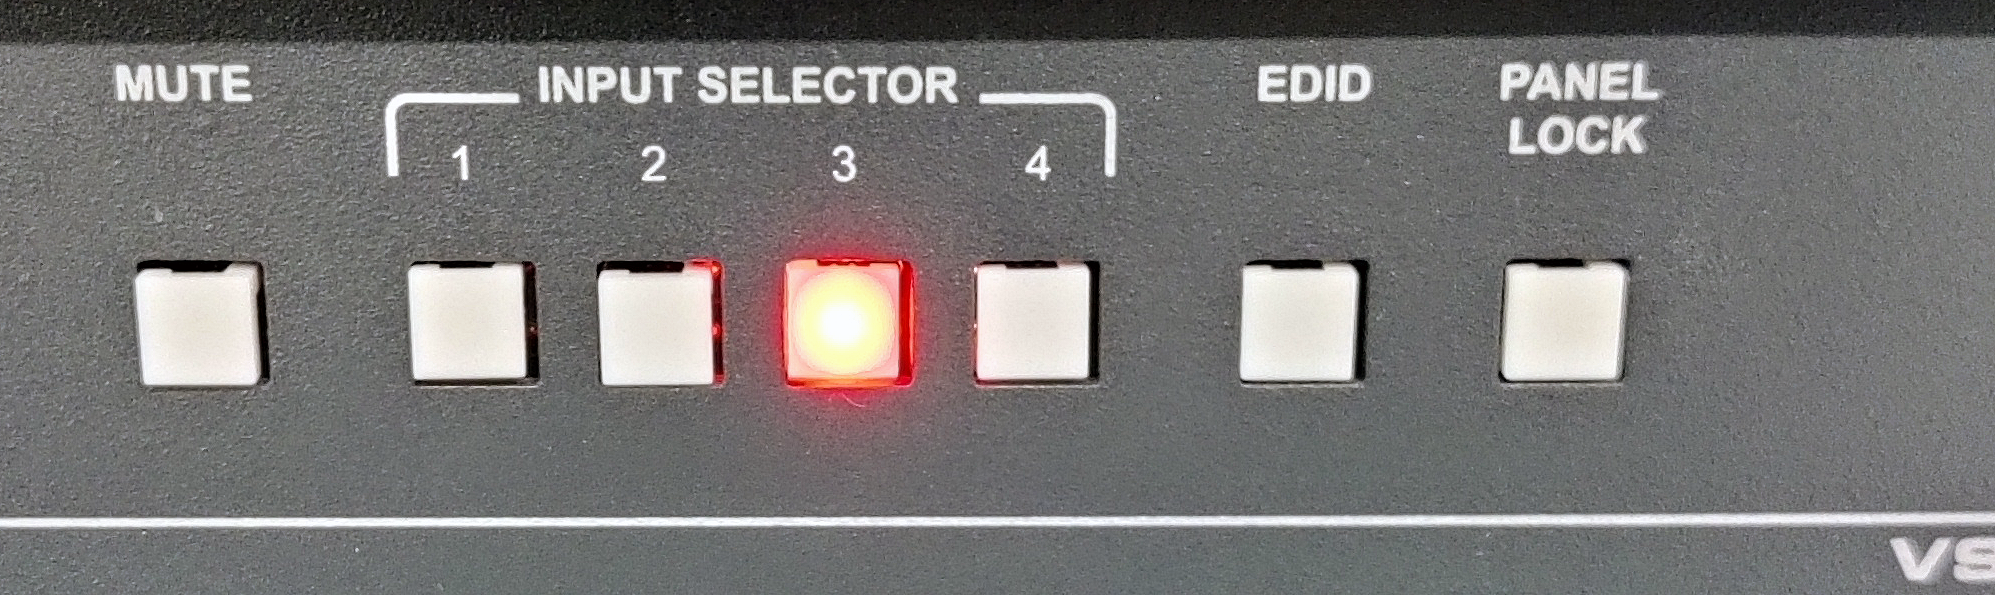
- Input 1 is the HDMI that comes out of the wall just above the video switcher. You can plug this into your own device to use it as a source.
- Input 3 is Workstation 9. The moCap PC.
- Input 4 is Workstation 8. The audio PC with a Vive headset attached.
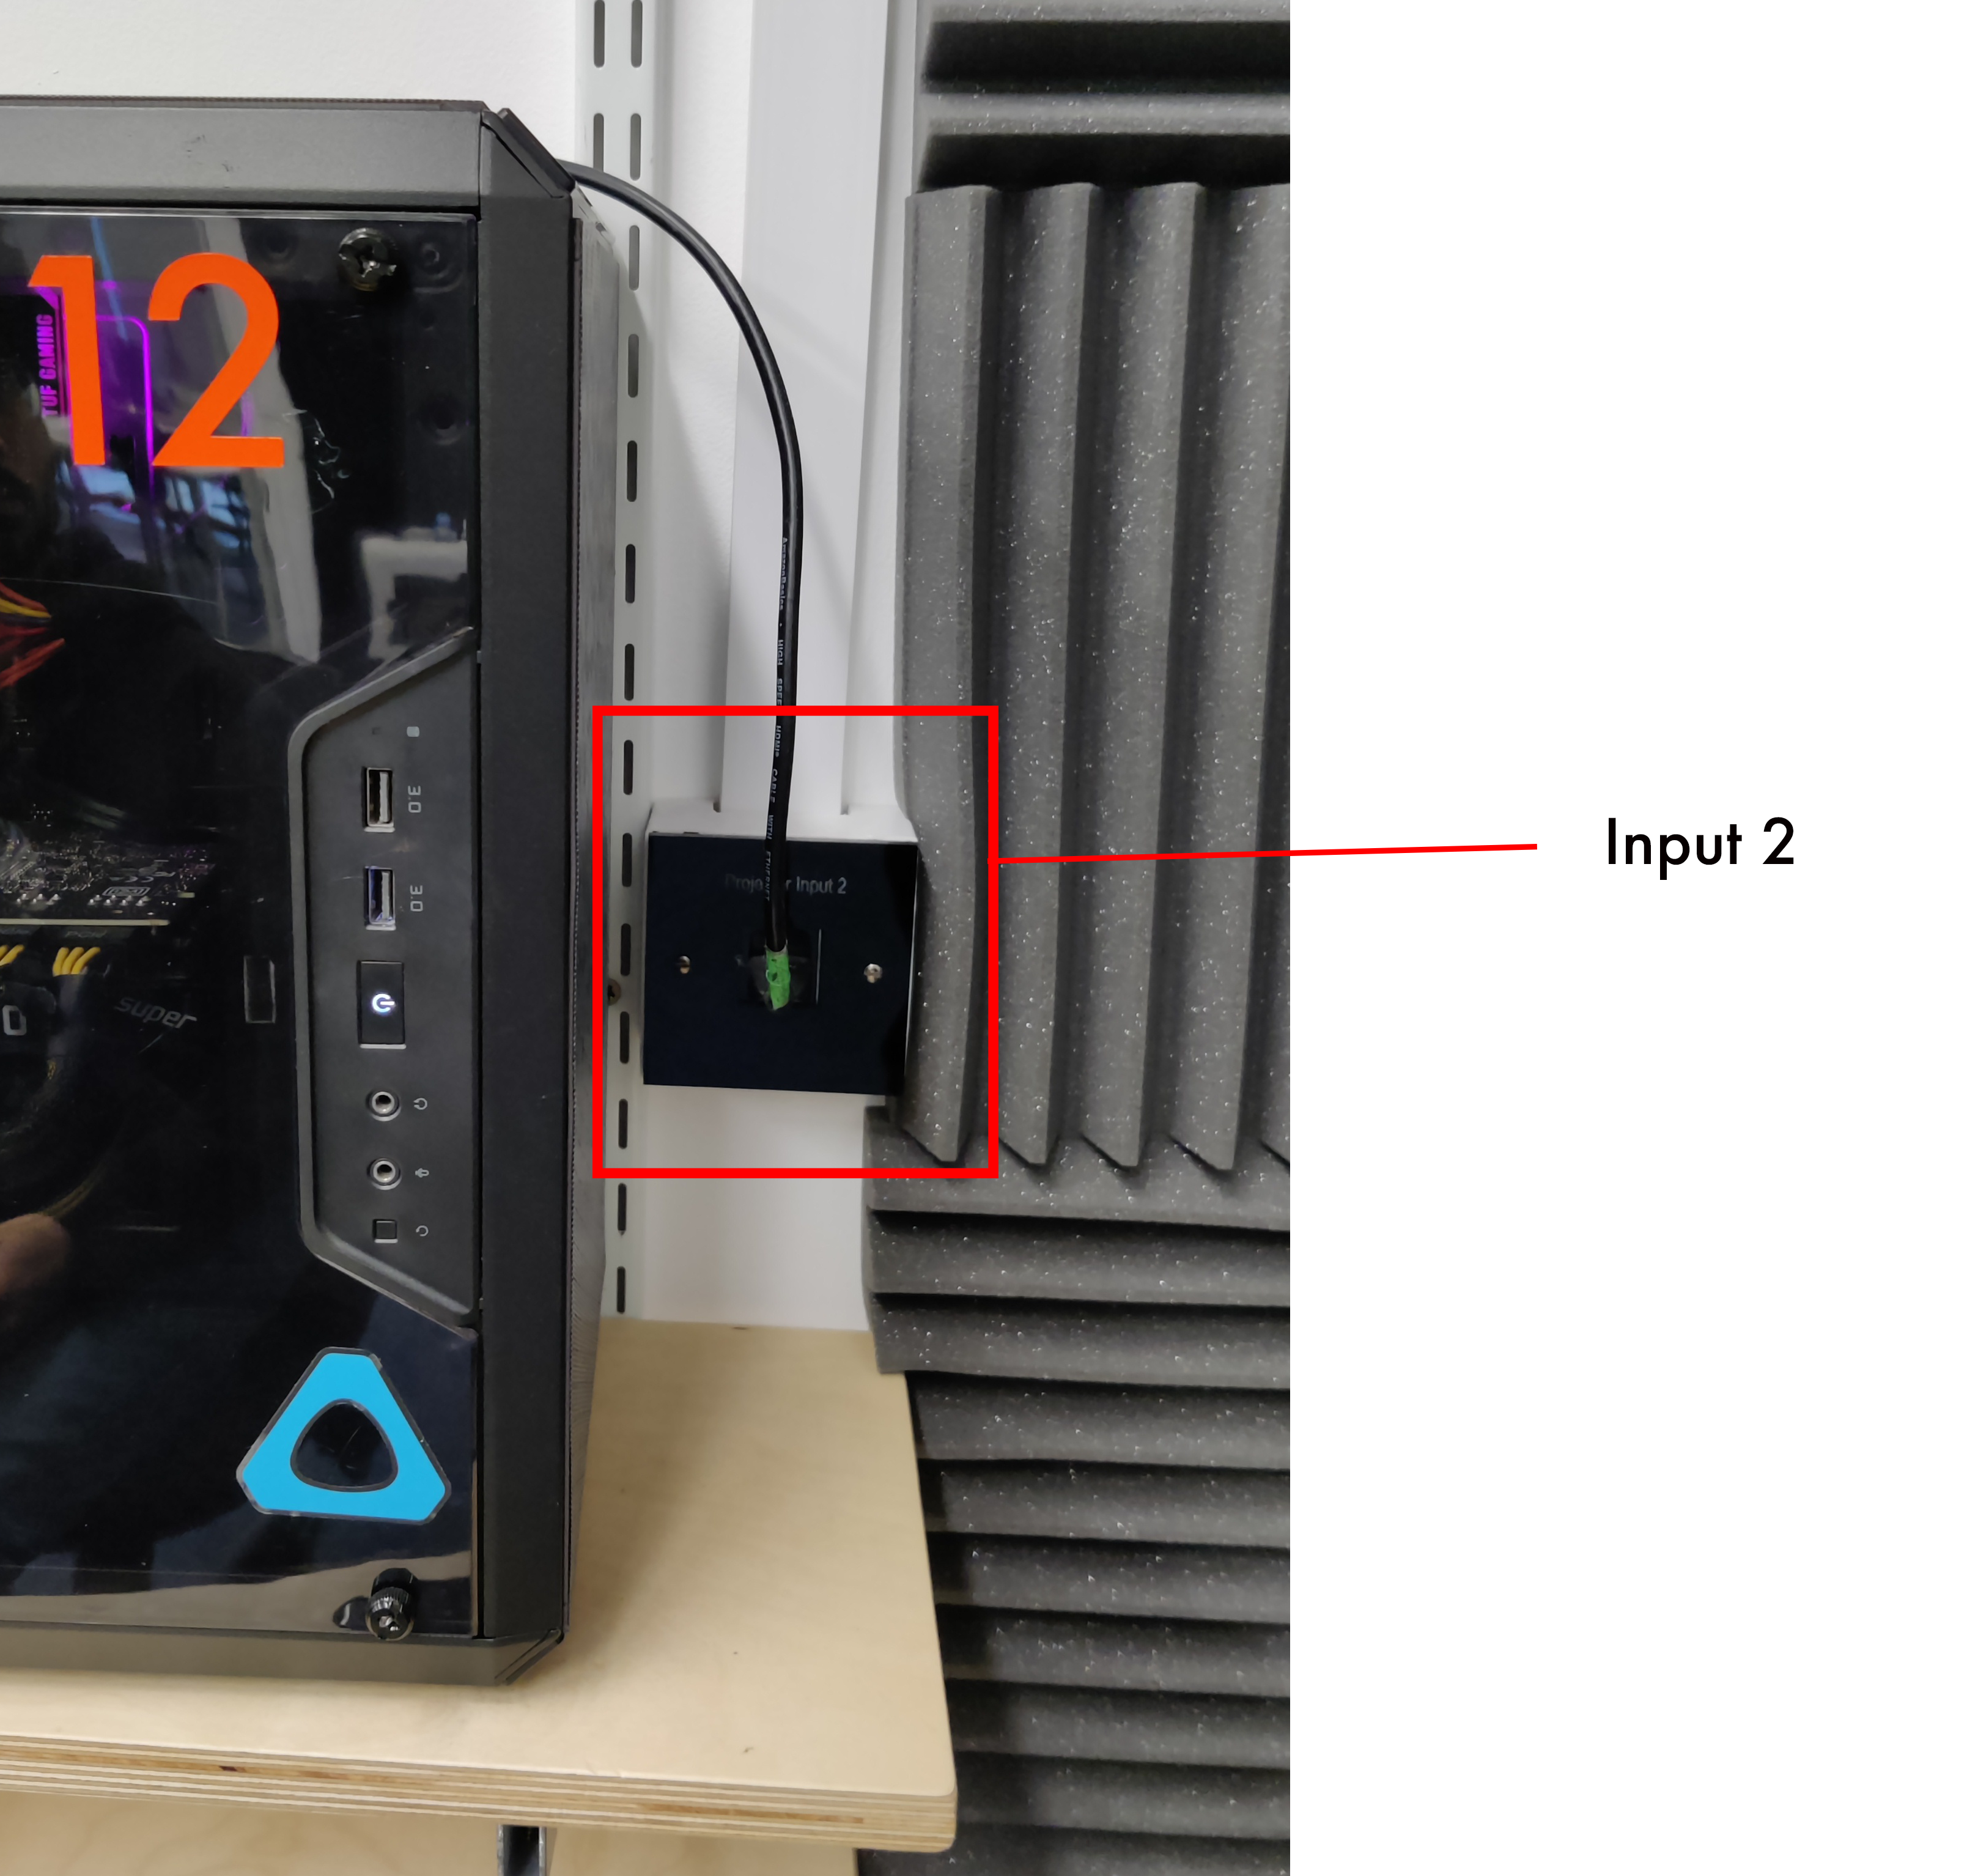
There is also an HDMI that comes out of the wall at the other side of the room, labelled input 2. You can use this for your own device, or to plug into Workstation 13. To use this input select HDMI2 as the source on the projector. To do this, use the source button on the remote.
When you are finished #
- Please turn the projector off. You will need to press the red button on the remote twice.
- Please put the remote back on the wall.
- Please return the room to a state you would be happy to find it in.
- If anything in the room is not working, or you need more information, speak to a member of staff or send an email to facilities@doc.gold.ac.uk.